SD Card
How to remove the SD card?
Before handling the SD card, always turn off the X40 controller first.
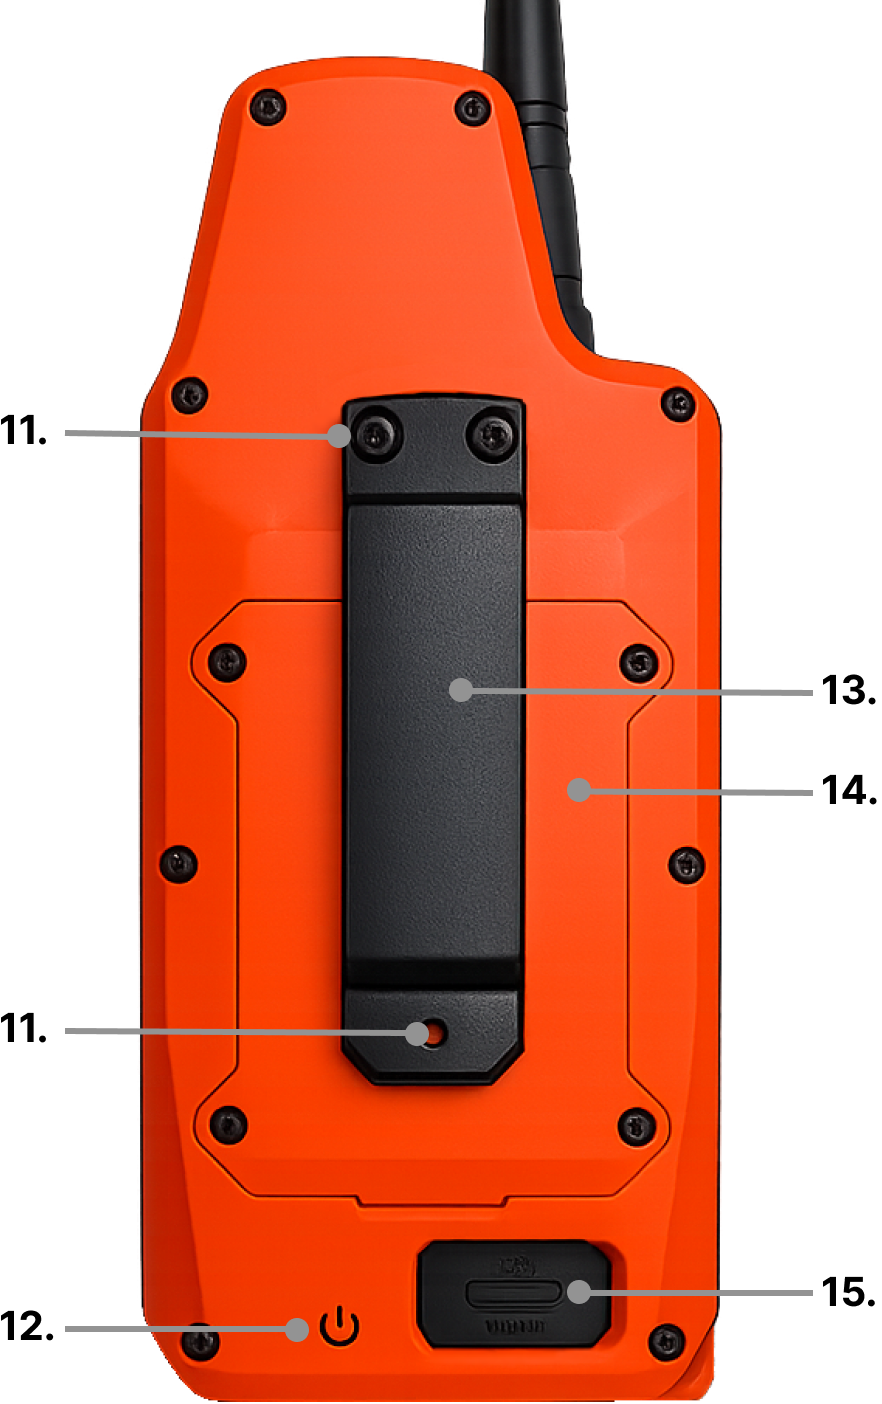
- Unscrew the belt clip (see picture below - number 13).
- Then unscrew the battery and SD card cover (see picture below - number 14).
- Remove the battery (no need to disconnect it) – the SD card is located under the battery.
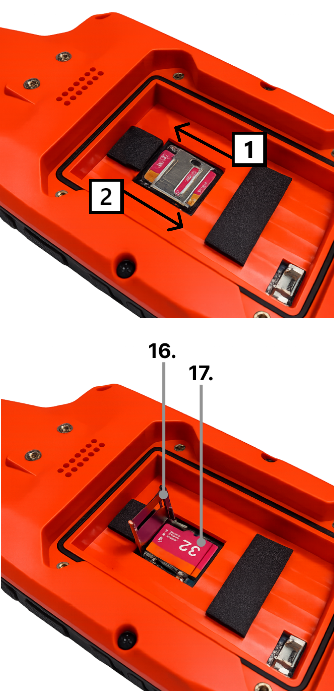
- First, slide the SD card cover in the direction of the arrow
 to unlock it.
 - Carefully lift the cover (see picture below - number 16).
- Remove the SD card (see picture below - number 17).
- When reinserting the SD card, first close the cover and then slide it downwards
 with your finger to lock it.
The SD card can have a maximum capacity of 32 GB.
After replacing the SD card, you need to upload the basic operating data to the card for the device to work properly. Follow these steps:
- Download the basic data package SD.zip
- Unzip the downloaded file (ZIP format).
- Copy all extracted files and folders directly to the root directory of the new SD card (not into a subfolder).
- Once done, the SD card is ready to use in the device.
Contents of the SD card
There are three folders and two files on the SD card:
| Folder / File | Description |
|---|---|
| Tracks | Tones that the controller can play |
| Logs | Recorded tracks of the controller and collars |
| Screenshots | Saved screenshots |
| logo.bin | Custom logo on the startup screen |
| names.bin | Stores collar names |
Tracks folder
- Contains tones that the controller can play
- Four free slots for custom tones
If you use the controller without an SD card, only four default beeps (from one to four short beeps) will appear in the tone menu.
💡 How to save your own tones?
1. Choose any audio file you want to use as a custom tone (supported formats: MP3, OGG, WAV).
2. Open the web app: https://doggpshunter.cloud/app/audio/.
3. Upload your selected sound to the app.
4. You can trim the sound as you like.
5. Click Export audio – the file will be downloaded to your computer.
6. The downloaded file will be named UserTone1.adpcm.
7. Remove the SD card from the controller and insert it into your computer.
8. Move the downloaded file to the Tracks folder on the SD card.
9. Custom tones on the SD card can be named UserTone1.adpcm, UserTone2.adpcm, UserTone3.adpcm, UserTone4.adpcm.
10. If there are multiple files with the same name on the SD card, rename them correctly as shown above.
11. In the controller, your tones will appear as “User Tone 1–5” when selecting an alert tone.
Logs folder
- Contains all tracks recorded so far
- You can view these tracks anytime in the mobile app
Before replacing the SD card, download all saved tracks in the mobile app. Downloading to the mobile app is not automatic!
Screenshots folder
- This folder stores captured screenshots
- Take a screenshot by briefly pressing the two bottom buttons (
 +
+  )
)
logo.bin file
- You can save a custom logo in this folder, which will be displayed when turning on the controller
💡 How to create your own logo?
1. Choose any image you want to use as your logo (supported formats: PNG, JPG, GIF, WebP).
2. Open the web app: https://doggpshunter.cloud/app/logo/.
3. Upload your logo to the app.
4. Select the crop area (336x80 px).
5. Convert the logo to black and white.
6. Click Download logo.bin – the file will be downloaded to your computer.
7. The downloaded file will be named logo.bin.
8. Remove the SD card from the controller and insert it into your computer.
9. Move the downloaded file to the SD card.
names.bin file
- When you pair a new collar or change its name, this information is saved in the names.bin file
- If you delete a collar and later pair it again, it will appear under the same name you set earlier